In my first article, I talked about using a separate drive to store your system backups and that if your PC didn’t have a second drive in your PC/Laptop, that you should consider buying a USB drive. That being the case, this article presumes you’ve taken care of that task and now you’re ready to create a copy of your system disk to use should disaster strike.
There are a number of ways you can back up your PC/Laptop, but let’s start with Window’s own process for creating a copy of your system drive. Regardless of which flavor of Windows you have installed on your PC, windows has an applet that will create a “system image,” which is an exact copy of the files on your startup drive at the time you make that image.
And if we’re going to create something we can use to restore our PC, we might want to make sure that “image” of our system is as clean as possible. Thus, there are a few maintenance items we should take care of first. That includes running Windows Update to ensure our security updates are all up-to-date. It also includes things like emptying the trash, cleaning up my disk space and removing temporary files, and defragmenting my hard drive (those of you who have an SSD for your system drive wouldn’t need to and shouldn’t defrag your drive). To complete a lot of those maintenance tasks, I use Glary Utilities. That’s a free PC maintenance application from Glarysoft.com. If you don’t have that installed, go ahead and click the link and give it a try.
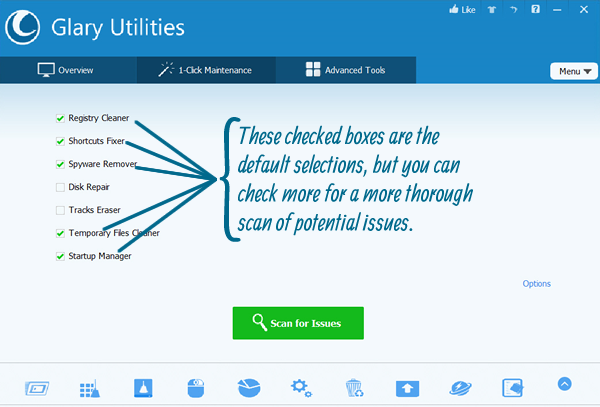
Glary Utilities has a “1-Click Maintenance” screen that performs a number of maintenance tasks to clean up your Registry and Shortcuts, put those temporary internet files you’ve accumulated while surfing the web in the trash and then empty the trash as well as optimize your startup apps. It can even be set to erase any internet tracks that may have been left behind as well as a check and repair, if necessary, of your hard drive. If you check “disk repair” the scan will take much longer than if left unchecked. I typically use the default checks and click on “Scan for issues.
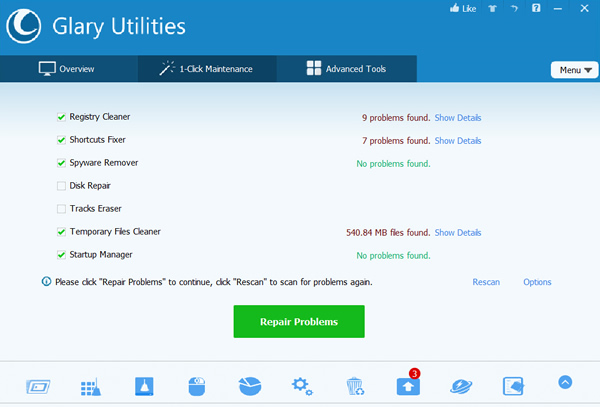
Once the scan is complete, it will show you the results of its scan. If you’d like, you can click on the “show details” links to see what type of issues it found. Most the time, it’s just unnecessary “values” that weren’t set during some software install or some file extension noted in the registry that you’re not using for any of your files. Click “Repair Problems” and it will take care of those issues for you.
Next I click on the “Advanced Tools” tab, where I click on “Defragment.” For those of you who may not understand why this is important, I’ll digress temporarily. As you save files to and delete files from your hard drive, things get a bit fragmented on your drive, which can slow things down. For example, when saving a file to your hard drive, Windows starts saving the file to the first available empty space. If there isn’t enough space in that location for the whole file, it lays down a marker to the next available space and then starts copying the rest of the file there, and if there isn’t enough empty space there, well, I think you get the picture. Your big file can be split up in a multitude of space across your drive.
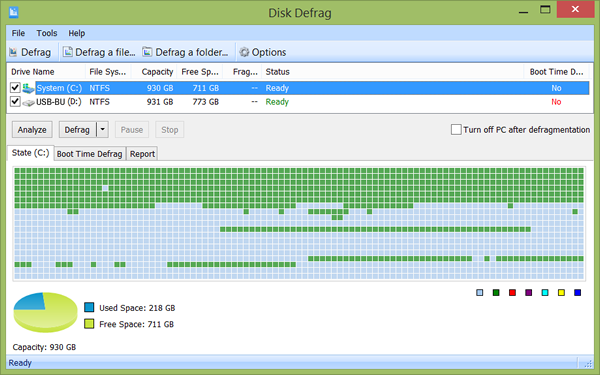
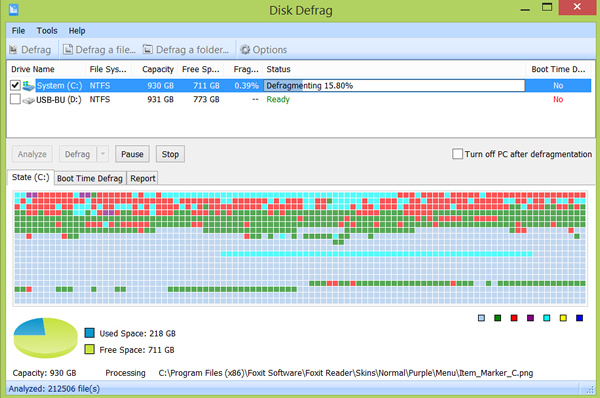
Clicking on “Defragment” will bring up the Disk Defrag utility. When it first opens, don’t let it fool you since everything is “green” that everything is hunky-dorey and that you have no fragmentation. It’s just opened the app, it hasn’t analyzed anything yet. You have two options: Analyze or Defrag the drives that are checked. “Analyze” just does and quick analysis and displays how much fragmentation is present. “Defrag” performs an analysis, displays what it found, and begins to defragment the drive. For what we’re doing here, we’re going to make sure that only the C-Drive is checked and click on “Defrag.” There are other functions we can perform with this tool, but that’s another article for another day.
You’ll immediately see a change in the screen and be able to see all of the file fragmentation present on your drive (shown in red). If you hover your mouse over the colored squares at the lower right of the window, it will show you what the different colors represent. Once the process is complete, it may not have resolved absolutely every bit of fragmentation on the drive, but it will be enough that our backup won’t be that of a severely fragmented drive.
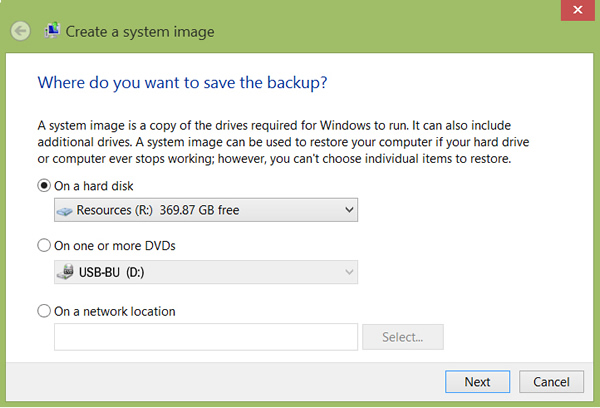
Okay, now. We’ve completed our drive maintenance, so let’s create a “System Image.” With Glary Utilities still open, click on “Backup Your Computer.” The “Create a System Image” application will open. If your USB drive is plugged powered up and plugged into a USB port, it should show up in the “On a Hard Disk” list as an available drive upon which you can store a system backup. After ensuring your USB drive (you may have named yours differently than mine), click on NEXT.
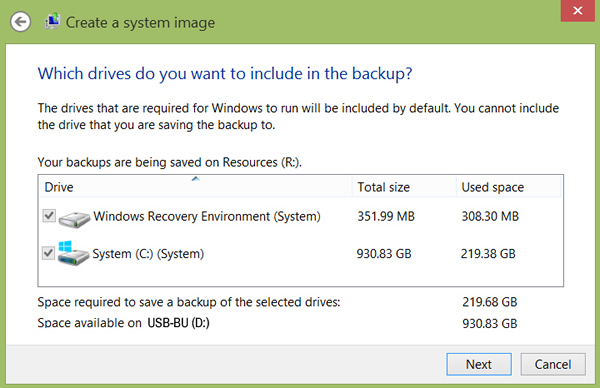
In the next screen, make sure your Windows “system” drive (the C: drive) is selected along with whatever system recovery partition that may have been written to the hard drive by your PC’s manufacturer, and then click on NEXT.
You should now have arrived at the confirmation screen showing you what you’re backing up and to which drive it’s being backed up. Click on the Start Backup button … then go get yourself a cup of coffee, put your feet up and relax. It’ will take a bit of time to complete the backup.
You should consider backing up your PC/Laptop at least once a quarter if you’re a home user who doesn’t create and store a lot of data/photos on a regular basis. Keep in mind that if it’s month 3 when disaster strikes, you’ll have 3 months of windows updates to install after you restore you PC using your 3 month old system image. If you frequently store new files or install regular updates for the programs on your PC, then you might want to consider creating a new system image monthly.
I keep two system images. After I’ve created a third, I delete the oldest one so that my two most-current images remain on my backup drive.
There are other applications that can be used to create backups of your drive or just certain data on your drive. In my next article, I’ll discuss two similar programs with which to do that: Microsoft’s SyncToy and 2BrightSpark’s SyncBack Free.


